


First of all I am a free soul, So if one of you guys decided to post this on another forum or a website, I would be appreciated if you give some CREDITs to the Developer simply typing his name: Credits to: ChiNa-Man, and do not CHANGE or DELETE the ORIGINAL CONTENT! Thank you!
:::::::::::::::::::::::::::::::::::::::::::::
Updated to Version 1.01(13 August 2012)
Believe it or not, Only 1 Template Edit! (Only Copy and Past) DONE!
New Update!
Now only visible for Guests, Non Logged in & Non Registered Users
From Normal Fonts
To Bold Fonts
A simple changes means a lot for someone who cares about the look!
ABOUT THE PRODUCT
This is maybe one of the best mods I ever made so far in my opinion, and the hardest to be honest! Filling out the Password sectioning was not easy, and the html form itself.. I think is one of a kind to Install! You can get this mod with 2 different Looks! 1 With normal Buttons like the ones provided by the browser! Every browser have their own kind of Buttons and models.
-----------------------------------------
The First Tutorial will be the a normal browser button style!
The other look is Custom, we choose what color we want for out buttons,WITH HOVER EFFECT & GRADIENT! If you want to make your own buttons, then simply go to this page: http://www.cssbuttongenerator.com and generate your own style! You will see the full tutorial at the end of this post!
10 Different LoginBox (Only a Few Showen as example)Dark (Custom CSS Button)
LightBlue (Custom CSS Button)
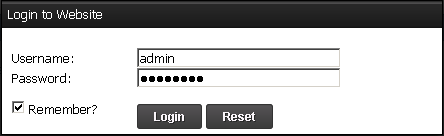
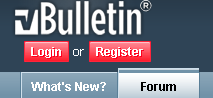
Normal Browser Button (No Custom)
Default (LoginBox Used as Default)
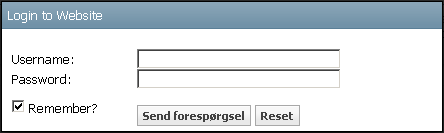
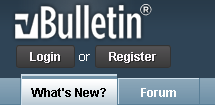
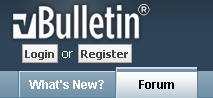
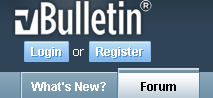
Original vB 4.x Skin Top
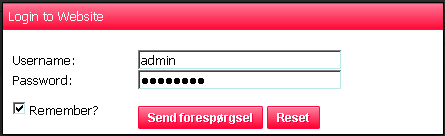
Custom Pink / Red Top
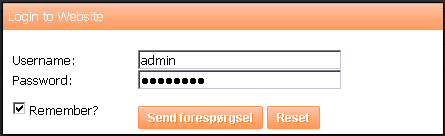
Custom Orange Top
Custom Light Blue Top
And 10 Different Button (Only a Few Showen as example)
Default Buttons (Custom)
Normal Browser Buttons
Orange Buttons (Custom)
Light Blue Buttons (Custom)
Red Buttons (Custom)
We Start The Tutorial HERE:
Tutorial 1:
With normal buttons (Browser Buttons)
Step 1: First got to your ADMINCP, and then Styles & Templates! Now you should see your template name, on right side of the name of your template there is a dropdown menu! In the dropdown menu choose Edit Templates!
And now look for the header template or where you want the Login & Register button to appear!
Use either Header or Navbar template. But in this case open your Header template, and scroll all the way down, and add the following code at the bottom of the header:
Add the Code Below In Your Header:
Code:<script src="//ajax.googleapis.com/ajax/libs/jquery/1.7.2/jquery.min.js" type="text/javascript"></script> <script type="text/javascript"> jQuery.noConflict(); jQuery(document).ready(function($) { $('#MyLogin input[name="url"]').attr("value", window.location); $('a[name="My"]').on('click', function(event) { event.preventDefault(); var target = $(this).attr('rel'); var maskHeight = $(document).height(); var maskWidth = $(window).width(); $('#mask').css({'width': maskWidth, 'height': maskHeight}); $('#mask').fadeIn(1000); $('#mask').fadeTo("slow", 0.8); var winH = $(window).height(); var winW = $(window).width(); $(target).css('top', (winH / 2) - ($(target).height() / 2)); $(target).css('left', (winW / 2) - ($(target).width() / 2)); $(target).fadeIn(2000); }); $('.MyBox a[rel="closeMy"]').on('click', function(event) { event.preventDefault(); $('#mask, .MyBox').hide(); }); $('#mask').on('click', function () { $(this).hide(); $('.MyBox').hide(); }); }); </script> <style type="text/css"> #mask { position: absolute; z-index: 9010; background-color: #000000; display: none; top: 0; left: 0; } .MyBox { position: fixed; width: 440px; display: none; z-index: 9015; background: #ffffff; border: 1px solid #000000; -webkit-box-shadow: 0px 7px 10px 0px rgba(0,0,0,0.81); -moz-box-shadow: 0px 7px 10px 0px rgba(0,0,0,0.81); box-shadow: 0px 7px 10px 0px rgba(0,0,0,0.81); } .MyBox .thead { font-weight: bold; } .MyBox .MyContent { padding: 5px 10px; } .topimg { background-image:url('images/top.gif');repeat-x left top; height: 27px; } .posi { position: relative; top: 5px; left: 6px; } </style> <vb:if condition="is_member_of($vbulletin->userinfo,1)"> <font color="white"> <div id="mask"></div> <a href="login.php" name="My" class="button" rel="#MyLogin">Login</a> or <a href="register.php" class="button" >Register</a> </font> <div id="MyLogin" class="MyBox MyLoginBox"> <div class="topimg"> <font color="white"> <b><span class="posi">Login to Website</span></b> </font> </div> <div class="MyContent MyLoginContent"> </script><form action="login.php" method="post" onSubmit="md5hash(vb_login_password, vb_login_md5password, vb_login_md5password_utf, 0)"><input type="hidden" name="do" value="login" /><input type="hidden" name="url" value="index.php" /><input type="hidden" name="vb_login_md5password" /><input type="hidden" name="vb_login_md5password_utf" /><input type="hidden" name="s" value="" /> <table border="0" width="100%"> <tr> <td> <font color="black"> <br/><label for="vb_login_username">Username:</label></font> </td> <td> <br/><input type="text" class="bginput" name="vb_login_username" size="26" accesskey="u" tabindex="1" style="width: 200px;" maxlength="30" size="25" /> </td> </tr> <tr> <td><font color="black"> <label for="vb_login_password">Password:</label></font> </td> <td> <input name="vb_login_password" type="password" class="bginput" accesskey="p" tabindex="1" style="width: 200px;" size="25" /> </td> </tr> <tr> <td><font color="black"> <label class="smalltext" title="Your login details will be remembered on this computer, otherwise you will be logged out when you close the browser!"><input type="checkbox" value="yes" checked="checked" name="remember" class="checkbox"> Remember?</label></font> </td> <td><br/> <input name="submit" type="submit" class="button" accesskey="s" tabindex="1" value="Login" /> <input name="reset" type="reset" class="button" accesskey="r" tabindex="1" value="Reset" /></td> </tr> </table> </form> </div> </div></vb:if>
Click Save and we are Done! Befor you do anything else, Dont forget to upload the background image for the TOP, called "top.gif" to your images folder! All the extra images are in the Extras.zip file!
Now Tutorial 1 with normal Buttons Finished!
Remember that the buttons are normal, and depends on which browser you use!
Tutorial 2:
With Custom Buttons
In tutorial 2 you do all same steps over again, and again back in your header template, add the code below! After the code is added, please read my instructions below the code, which is very important if you want to change the color and etc...
Now add the code below in the header: (Below everything else)
Code To Add In header:
Click Save, and your done !!!!Dont forget to upload the background image for the TOP, called "top.gif" to your images folder! All the extra images are in the Extras.zip file, Download it from the Attachments! Inside the file there is a folder called "images", simply upload the "top.gif" to your "images" folder!Code:<script src="//ajax.googleapis.com/ajax/libs/jquery/1.7.2/jquery.min.js" type="text/javascript"></script> <script type="text/javascript"> jQuery.noConflict(); jQuery(document).ready(function($) { $('#MyLogin input[name="url"]').attr("value", window.location); $('a[name="My"]').on('click', function(event) { event.preventDefault(); var target = $(this).attr('rel'); var maskHeight = $(document).height(); var maskWidth = $(window).width(); $('#mask').css({'width': maskWidth, 'height': maskHeight}); $('#mask').fadeIn(1000); $('#mask').fadeTo("slow", 0.8); var winH = $(window).height(); var winW = $(window).width(); $(target).css('top', (winH / 2) - ($(target).height() / 2)); $(target).css('left', (winW / 2) - ($(target).width() / 2)); $(target).fadeIn(2000); }); $('.MyBox a[rel="closeMy"]').on('click', function(event) { event.preventDefault(); $('#mask, .MyBox').hide(); }); $('#mask').on('click', function () { $(this).hide(); $('.MyBox').hide(); }); }); </script> <style type="text/css"> #mask { position: absolute; z-index: 9010; background-color: #000000; display: none; top: 0; left: 0; } .MyBox { position: fixed; width: 440px; display: none; z-index: 9015; background: #ffffff; border: 1px solid #000000; -webkit-box-shadow: 0px 7px 10px 0px rgba(0,0,0,0.81); -moz-box-shadow: 0px 7px 10px 0px rgba(0,0,0,0.81); box-shadow: 0px 7px 10px 0px rgba(0,0,0,0.81); } .MyBox .thead { font-weight: bold; } .MyBox .MyContent { padding: 5px 10px; } .topimg { background-image:url('images/top.gif');repeat-x left top; height: 27px; } .posi { position: relative; top: 5px; left: 6px; } </style> <style type="text/css"> .classname { -moz-box-shadow:inset 0px 1px 0px 0px #4f4f4f; -webkit-box-shadow:inset 0px 1px 0px 0px #4f4f4f; box-shadow:inset 0px 1px 0px 0px #4f4f4f; background:-webkit-gradient( linear, left top, left bottom, color-stop(0.05, #545254), color-stop(1, #3b3b3b) ); background:-moz-linear-gradient( center top, #545254 5%, #3b3b3b 100% ); filter:progid:DXImageTransform.Microsoft.gradient(startColorstr='#545254', endColorstr='#3b3b3b'); background-color:#545254; -moz-border-radius:3px; -webkit-border-radius:3px; border-radius:3px; border:1px solid #333333; display:inline-block; color:#faf5fa; font-family:arial; font-size:12px; font-weight:bold; padding:3px 13px; text-decoration:none; text-shadow:1px 1px 0px #292929; }.classname:hover { background:-webkit-gradient( linear, left top, left bottom, color-stop(0.05, #3b3b3b), color-stop(1, #545254) ); background:-moz-linear-gradient( center top, #3b3b3b 5%, #545254 100% ); filter:progid:DXImageTransform.Microsoft.gradient(startColorstr='#3b3b3b', endColorstr='#545254'); background-color:#3b3b3b; }.classname:active { position:relative; top:1px; } </style> <vb:if condition="is_member_of($vbulletin->userinfo,1)"> <font color="white"> <div id="mask"></div> <a href="login.php" name="My" rel="#MyLogin" class="classname">Login</a> or <a href="register.php" class="classname">Register</a> </font> <div id="MyLogin" class="MyBox MyLoginBox"> <div class="topimg"> <font color="white"> <b><span class="posi">Login to Website</span></b> </font> </div> <div class="MyContent MyLoginContent"> </script><form action="login.php" method="post" onSubmit="md5hash(vb_login_password, vb_login_md5password, vb_login_md5password_utf, 0)"><input type="hidden" name="do" value="login" /><input type="hidden" name="url" value="index.php" /><input type="hidden" name="vb_login_md5password" /><input type="hidden" name="vb_login_md5password_utf" /><input type="hidden" name="s" value="" /> <table border="0" width="100%"> <tr> <td> <font color="black"> <br/><label for="vb_login_username">Username:</label></font> </td> <td> <br/><input type="text" class="bginput" name="vb_login_username" size="26" accesskey="u" tabindex="1" style="width: 200px;" maxlength="30" size="25" /> </td> </tr> <tr> <td><font color="black"> <label for="vb_login_password">Password:</label></font> </td> <td> <input name="vb_login_password" type="password" class="bginput" accesskey="p" tabindex="1" style="width: 200px;" size="25" /> </td> </tr> <tr> <td><font color="black"> <label class="smalltext" title="Your login details will be remembered on this computer, otherwise, you will be logged out when you close the browser!"><input type="checkbox" value="yes" checked="checked" name="remember" class="checkbox"> Remember?</label></font> </td> <td><br/> <input name="submit" type="submit" class="classname" accesskey="s" tabindex="1" value="Login" /> <input name="reset" type="reset" class="classname" accesskey="r" tabindex="1" value="Reset" /></td> </tr> </table> </form> </div> </div></vb:if>
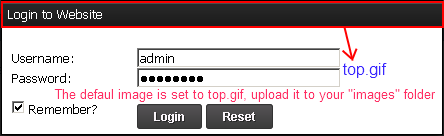
Your Top Image is set to "top.gif" as default!
If you wanted to change your TOP, then replace the "top.gif" with one of the files in the "Extras.zip" images folder! top1.gif, top2.gif, top3.gif, top4.gif and many others!
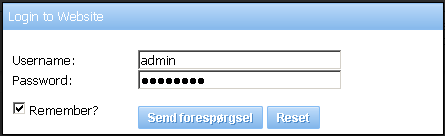
Example of Default LoginBox with "top.gif"
Simply decide which image (top1.gif, top2.gif, top3.gif, top4.gif) that you wanna use for the top of your loginbox. If you are using vBulletin 4.x default theme then the TOP is called "top3.gif", and has the same look as the vB 4.x Default theme & color!
IMPORTANT!!!!!
How to change the Button Color & Gradient?
I have generated the buttons from --> http://www.cssbuttongenerator.com/
Short Video Tutorial --> http://www.youtube.com/watch?v=_YxjCsZV_w0
You will find a txt file inside the Extras.zip, called "Extra CSS Colors.txt" with 10 Different CSS colors for your Buttons! All what you have to do is to COPY the CODES from the Extra CSS Colors.txt and ONLY replace the codes THAT I HAVE MARKED WITH "RED COLOR"!
Bạn ghé thăm diễn đàn lần đầu? hãy đăng ký ngay bây giờ để tham gia.
Chào mừng bạn đến với ITVNN FORUM - Diễn đàn công nghệ thông tin.
Nếu đây là lần đầu tiên bạn tham gia diễn đàn, xin mời bạn xem phần Hỏi/Ðáp để biết cách dùng diễn đàn. Để có thể tham gia thảo luận bạn phải đăng ký làm thành viên, click vào đây để đăng ký.
Search Forums
Liên kết hữu ích: Công ty Truyền thông - Sự kiện Gia Lai | Việt Nam Anh Hùng | Điện Lạnh Gia Lai | Xe tải nhận chở hàng Pleiku | Thêm textlink của bạn
-

 Partner Area
-
kết quả từ 1 tới 2 trên 2


-
14-03-2013, 08:15 PM #1

Trạng thái- Offline
Họ tên- Mai Thanh Trung
Tham gia ngày- Aug 2006
Thành viên thứ- 1
Đến từ- Pleiku, Gia Lai
Tuổi- 39
Giới tính Bài gởi
- 4,984
Cảm ơn 53Cảm ơn 2,450 lần / 1,409 Bài viết
 [CM] PopUp LoginBox (LightBox Effect + Shadow)
Chủ đề mới cùng chuyên mục
- » giống chuối xiêm và già Nam Mỹ cấy mô 0937392133... (04/12/2023)
- » Xin giúp đỡ về Vbb4.1.11! (21/07/2015)
- » Automatic Products Update Check (02/11/2014)
- » [bridge2heyday] - Automatically Add a Copyright Notice... (02/11/2014)
- » Xin Mod thay đổi màu của User trong Vbb (28/07/2014)
- » [AJAX] Search Forums by Title (15/03/2014)
- » Auto display custom image when link images die in post (01/03/2014)
- » Modal Login Box (23/02/2014)
- » Patched Flash Uploader to Fix Known Exploits (23/01/2014)
- » Yet Another Awards System (05/01/2014)
Có thể bạn quan tâm
- » Thuốc nở ngực an toàn hiệu quả - Những điều cần biết (28/04/2024)
- » Phẫu thuật cắt bỏ ngực chuyển giới từ nữ sang nam (27/04/2024)
- » Nâng ngực túi xốp Polytech| Thẩm mỹ viện Ngô Mộng Hùng (27/04/2024)
- » Nâng ngực túi xốp là gì? Những điều cần biết (27/04/2024)
- » Nâng ngực ở Mỹ và Việt Nam có gì khác biệt? (27/04/2024)
- » Nâng ngực có ảnh hưởng đến việc cho con bú không? (27/04/2024)
- » Dịch vụ thay màn hình tivi samsung giá rẻ bất ngờ (27/04/2024)
- » Miếng dán nâng ngực giá bao nhiêu tiền? (27/04/2024)
- » Hình ảnh phẫu thuật nâng ngực| Thẩm mỹ viện Ngô Mộng... (27/04/2024)
- » Hướng dẫn tải Apps game, bóng. (27/04/2024)
-
15-03-2013, 12:19 PM #2


Trạng thái- Offline
Tham gia ngày- Mar 2013
Thành viên thứ- 82990
Tuổi- 36
Giới tính Bài gởi
- 1
Cảm ơn 0Cảm ơn 0 lần / 0 Bài viết
Dien thoai duc xu .com ban le phu kien dien thoai gia re 0902 249 887


 Trả Lời Với Trích Dẫn
Thread Information
Users Browsing this Thread
There are currently 1 users browsing this thread. (0 members and 1 guests)
Similar Threads
-
Tải Adobe After Effect CS6 Full và Hướng Dẫn Cài Đặt
By peterlionelvn in forum Phần mềmTrả lời: 0Bài mới gởi: 04-07-2020, 01:39 AM -
Download game hành động Mass Effect Andromeda-CPY
By whitelion in forum Game offlineTrả lời: 0Bài mới gởi: 08-04-2017, 10:57 PM -
Share mod popup quảng cáo lightbox vbb all ver cực đẹp
By bavuongduongpho in forum v4.x ModificationsTrả lời: 4Bài mới gởi: 15-09-2013, 10:06 PM -
Thắc mắc về Shadow Defender!
By Tung_hp in forum Tin học căn bảnTrả lời: 4Bài mới gởi: 29-09-2009, 07:37 AM -
Virus Effect Remover 3.0
By bavuongduongpho in forum Security - AntivirusTrả lời: 0Bài mới gởi: 08-09-2009, 07:35 PM
Tags for this Thread
Quuyền Hạn Của Bạn
- Bạn không thể tạo chủ đề mới
- Bạn không thể trả lời bài viết
- Bạn không thể gửi file đính kèm
- Bạn không thể chỉnh sửa bài viết
Múi giờ GMT. Hiện tại là 07:15 AM.
Powered by vBulletin® Version 4.2.5
Copyright © 2024 vBulletin Solutions, Inc. All rights reserved.
Copyright © 2024 vBulletin Solutions, Inc. All rights reserved.
Bookmarks